Barnwood Shim Door
- Dianna Heppe
- Sep 14, 2020
- 4 min read
These are NOT my instructions. I want to make this door for my laundry room in my dream house. I am saving them for when I can make the door, and will post pictures when I accomplish that goal - unfortunately, I don't know where I got the instructions.

Sliding barn door projects are springing up everywhere nowadays! I wanted to get on the wagon without looking like there’s, well, a wagon behind the door. This wood shim design is a fun twist on the standard barn door that’s a little more modern and a lot more unique!
I started thinking about installing a sliding barn door. I wanted to avoid the classic “barn door” with the X pattern, but couldn’t think of anything that would fall into the rustic/modern/industrial style of our basement media room.
One day, the fates collided! I stumbled upon this amazing headboard by my friend Sheri at Hazel & Gold Designs, and knew the wood shim texture was exactly what I was looking for. At the same time, Artisan Hardware asked me to create a sliding barn door using their gorgeous hardware!
This post will show you how to build the door. You can find all the details on installing the sliding barn door hardware here. Click on the video below to get a quick overview of the building process.
Materials Needed for DIY Sliding Barn Door
3/4″ plywood cut to the dimensions of your door plus trim
Mine is 37 1/4″ x 80″
3 – 1 x 6 boards
Wood veneer banding (optional)
Wood stain
I used Varathane’s Stain + Poly in Kona to save myself the step of applying polyurethane to all those shims!
How to Make a Sliding Barn Door
Don’t forget your safety gear when woodworking! Here are my recommendations for safety glasses and ear protection. No excuses!
Build the Sliding Barn Door Frame
Cut a sheet of 3/4″ plywood to the size of your door opening plus the trim. You want to cover the sides of the mouldings entirely when the door is closed.
If your plywood has one side that looks nicer than the other, use the better side for the back of the door. You’ll be covering up the entire front, so any knots or filler will be hidden.
Cut two 80″ 1 x 6 pieces and attach them to the sides of the plywood with 1 1/4″ brad nails. Measure the width between these two boards, and cut three 1 x 6 pieces to fit. Attach them to the top, bottom and center of the door to create the frame.
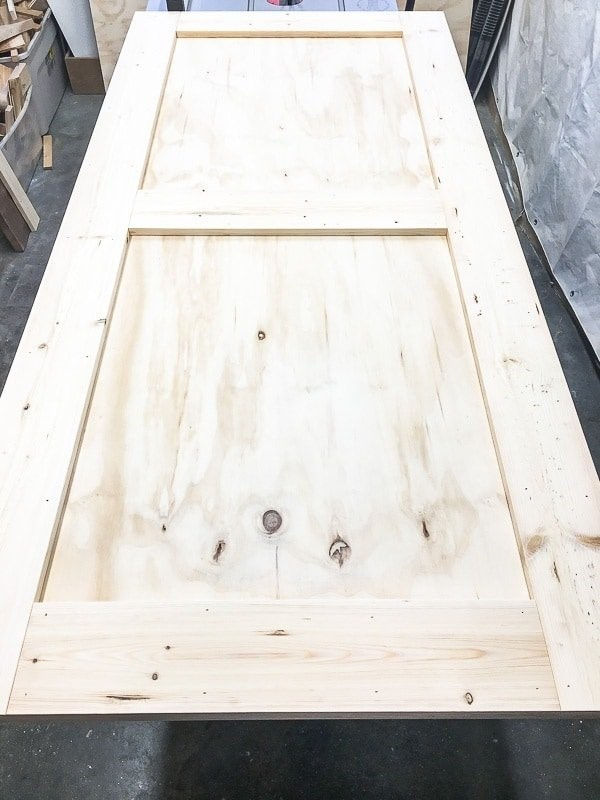
I’m not a huge fan of raw plywood edges, so I used wood veneer banding to cover up the exposed edge on the sides of the door. There’s still a line down the center, but at least now the materials appear consistent. Just iron it on and sand down any rough edges.

Stain the entire surface of the door. This will prevent the plywood color from showing through the gaps between the wood shims. I used Varathane’s Kona Stain + Poly, to match the floating shelves I built on the opposite side of the room.

Prepare the Wood Shims
Check out each pack of wood shims before you put them in your shopping cart. I found a HUGE difference in quality between packs and between stores carrying the same brand! Search for ones that have a nice grain and sharp corners like the one on the left.
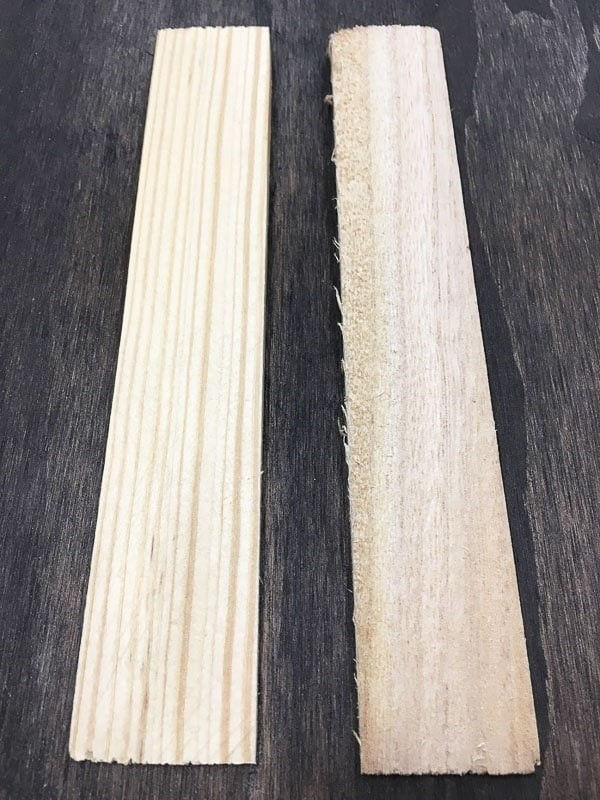
Knock off any splinters from the edges and give each shim a quick once-over with a sanding sponge. You want the shims as uniform as possible, so set aside any with knots or weird grain markings.
Lay out a row of wood shims along the width of the door to see how many will fit. I had about 1/4″ of space left, which gave me a little wiggle room when placing the shims. There are 19 in a row.

Decide on the pattern you want to create. I did two alternating rows, with the top panel shims pointing up and the bottom ones pointing down. Each shim overlaps with the one under it by 2 1/2″. But this creates a gap at the bottom or top of each row where a full shim won’t fit.

Use those irregular shims you weeded out earlier if you can salvage the top or bottom half. Cut twenty shims 5 1/2″ from the wide end and twenty shims 5″ from the narrow end. These pieces will keep the angle of the shims consistent at the beginning and end of each row.

Attach the Wood Shims to the Sliding Barn Door Panels
Getting the first few rows of shims down correctly makes the rest of the installation much smoother.
Run a line of wood glue down the length of the panel. Place one 5″ cut shim with the wider end against the middle 1 x 6, and nail into place with a 5/8″ brad nail.

The second shim overlaps the first by 2 1/2″. I used my Kreg combination square to quickly measure the placement. Nail through both shims.

Continue adding shims. The final piece should fit perfectly at the bottom of the row.

Apply another line of wood glue. Place a full size shim next to the first row, but not quite touching. Nail in place on the wide end.

Keep the same 2 1/2″ overlap as before. The wide ends of this row should be halfway between the wide ends of the first row. If you use the square, the end of the ruler should line up roughly with the end of the shim in the first row.

At the end of this row, there’s not enough room for a full shim. Use the 5 1/2″ cut shims to continue the pattern and fill the space.

From here, it goes much faster! Use the combination square to line up the ends with the matching row.

The finished effect is so cool! It almost looks like dragon scales!


This is one project where you really want to invest in a nail gun like the Ryobi Airstrike. I can’t imagine doing this with a hammer and nails! It looks like a lot of work, but I finished attaching all the wood shims in a little over an hour.
With all the wood shims attached, stain them (or leave them natural for a two toned effect!) Use a brush to really get into all those cracks and gaps.

Once the front is dry, stand the door up on end and stain the back the same color.
Ready to see it? The final look is so cool!


Comments